

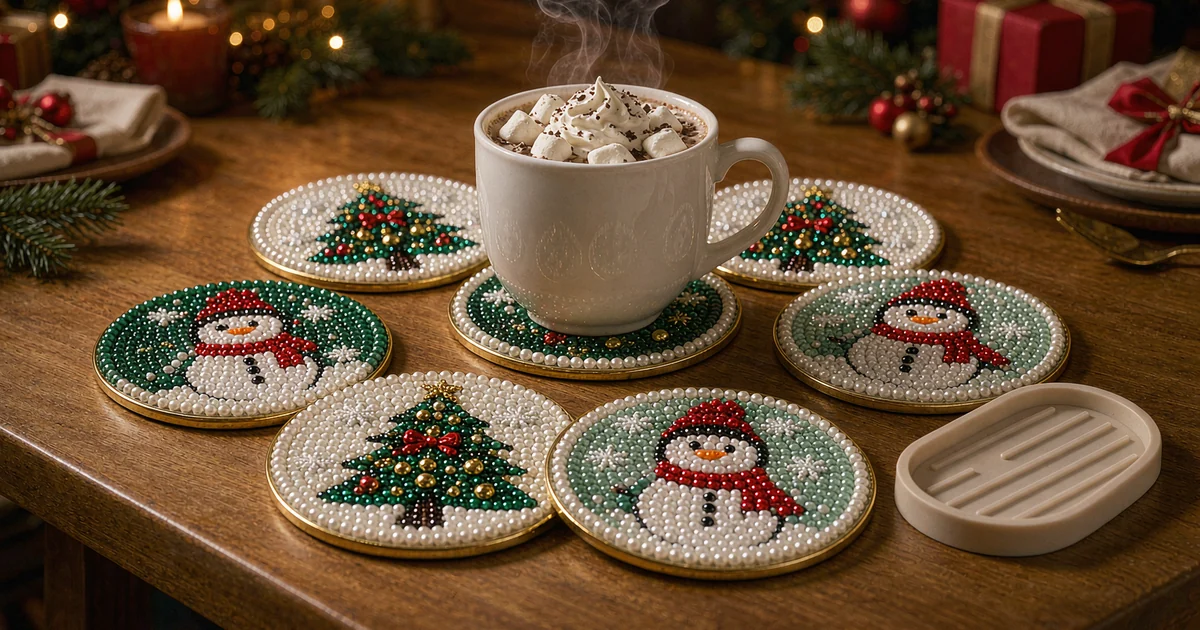
Search “how to make Christmas diamond painting coasters” and you’ll find a hundred tutorials that all describe the same process: peel the film, load the pen, place the beads, done.
They’re not wrong. They’re just incomplete.
Here’s what they leave out: coasters are the one diamond painting format that gets used. Wall art hangs there. A coaster has a mug of 190°F coffee set on it, gets wiped with a damp cloth, and lives in a stack where beads grind against each other. The failure modes are completely different from a framed canvas — and most tutorials never mention them.
This is the version that does. It walks the full build, then spends real time on the six things that actually go wrong, and how to fix each one.
If you’re completely new to the craft, start with our complete beginner’s guide first, then come back. Everything below assumes you know what a drill is.
Coasters differ from a canvas kit in ways that matter before you place a single bead.
| Factor | Canvas Kit | Coaster Set |
|---|---|---|
| Surface | Printed fabric canvas | Rigid board / acrylic base |
| Bead adhesion | Fabric glue layer | Board-mounted adhesive |
| Count of pieces | 1 large project | 6–10 small projects |
| Handling | Laid flat, framed | Picked up, stacked, wiped |
| Failure risk | Bead gaps | Bead loss + warping + water damage |
| Best workspace | Table, 2 evenings | Tray or mat, 1 evening per pair |
What you need: your kit, the wax and applicator pen it ships with, a sorting tray, tweezers (for corrections), a flat lid or mat to work on, and — for later — a clear craft sealer.
One setup rule that matters: work on a surface you can leave undisturbed. Coaster work is stop-start, and the single biggest cause of misaligned beads is a project that got nudged between sessions.
Don’t complete coaster one, then open coaster two. Lay all six (or ten) out and check the color coding across the whole set.
Manufacturers print symbol charts per board, and on larger set runs the same color can appear at slightly different symbol sizes across boards. Doing this upfront saves you from discovering halfway through the last coaster that you’re short on a color.
For Christmas designs specifically, you’ll usually be working with a tight palette — reds, greens, gold, white, and a small amount of detail color. Place your trays in a fixed left-to-right order and never rearrange them mid-project. Muscle memory is a real speed gain here; hunting for a tray is the biggest time sink for beginners.
This is the single most important technique for boards. Peel back only the section you’re actively working — a quarter of the board at most.
On a fabric canvas, a fully exposed adhesive layer is annoying. On a rigid board, it’s worse: the board stays sticky for hours, collects dust and stray beads, and the exposed glue degrades. Section peeling is not optional here.
Start in the middle of each color region and work outward to the edges. On coaster boards, edge beads are the ones that catch on things later. Working outward-to-in gathers the alignment error at the outermost row, where it’s most visible and most likely to snag.
This step doesn’t exist in most tutorials, and it’s the one that prevents half the problems below. After finishing a coaster, leave it flat and untouched for 12–24 hours. The adhesive needs time to reach full bond strength.
Stacking a fresh coaster — or sealing it immediately — before the cure is why beads come loose weeks later.
Read the sealing section below before you do this. Coasters need sealing more than wall art does, and doing it wrong is worse than not doing it.
This is the part you actually came for.
Cause: Almost always one of three things — sealing too early (before the 12–24 hour cure), sealing with a product that won’t bond to acrylic/board, or physical abrasion from stacking unsealed pieces.
Fix:
Cause: Water-based sealers absorb into the board and cause dimensional curl. This is the most common failure and the one most tutorials cause by recommending the wrong sealer.
Fix: Switch to a solvent/acrylic sealer. Apply two thin coats rather than one thick one, with full dry time between. Always seal both sides if your kit’s board is bare on the back — unbalanced coating is itself a warp cause.
Cause: Sealer applied over an incompletely cured surface, or over residual wax from the applicator pen.
Fix: Before sealing, wipe the surface gently with a dry, lint-free cloth to remove wax residue. Then apply thin coats. If your finished piece looks hazy, it’s usually a wax-sealer interaction, not a bead problem.
Cause: Placement error accumulating from the edge inward. On small boards this is very visible because the edge is a hard border.
Fix: For a running project, switch to center-outward placement. For a finished coaster with a crooked final row, use tweezers to lift and reposition the affected beads — the bond is still soft enough within the first hour or two.
Cause: Not a manufacturer defect, usually. It’s the color-shortage problem from Step 1.
Fix: Do the set-wide sort first. If you’re already short, most Christmas kits use standard drill sizes, so spare beads from another kit or a standard refill pack will match. Don’t substitute a visibly different size — on a coaster, a mixed-height bead is obvious under a mug.
Cause: The board base is smooth acrylic with no grip.
Fix: Most coaster kits on dotzso.com ship with an anti-slip holder or backing for exactly this reason — use it. If yours doesn’t, self-adhesive cork or felt dots on the underside solve it permanently without changing the look.
A condensed version of the process, because this step determines whether your set survives December:
Our full guide to sealing and displaying a diamond painting goes deeper into sealer types if you’re working with a kit that specifies particular materials.
Once you know the process, the design question gets easier. The strongest Christmas coaster approaches:
For broader pattern inspiration, see our coaster ideas collection.
Sets suited to this project:
If you want the step-framed version of the basic assembly without the troubleshooting layer, our 6-step coaster walkthrough covers that; this article is the one to keep open when something goes wrong.
Q: How long does a full 6-piece coaster set take to make? A: Plan on 4–6 hours total for a first set, split across two or three sessions. The held-out time is curing and sealing, not beading.
Q: Do I have to seal them? A: Strongly recommended. Unsealed coasters work, but beads can shed over months of wiping and stacking. Sealing roughly doubles the usable life.
Q: What sealer should I use? A: A clear acrylic- or solvent-based craft sealer. Avoid water-based glue and paper varnishes — those are the primary cause of warping.
Q: Can I use these as real coasters, or are they decorative? A: With a proper sealer and full cure, yes — they’re functional. A hot mug on a properly sealed set is fine. An unsealed set should be treated as decorative only.
Q: My beads are falling off a coaster I already finished. Can I fix it? A: Yes. Reseat the missing beads with a dot of clear-drying craft glue, cure 24 hours, then seal the whole piece. Don’t just glue and stack.
Q: How many coasters should I make for a gift? A: Six is the standard sweet spot — enough to feel like a set, small enough to finish. Ten works as a host gift or for splitting into two gifts.
Q: Are coasters easier or harder than a regular diamond painting kit? A: Easier per piece, harder overall — a 6-piece set has six times the setup and needs sealing. As a first diamond painting project, coasters are actually the most forgiving entry point because each unit is small and completion is fast.
The beading takes an evening. The curing and sealing takes a day. What you get is a coaster set that goes on the table every Christmas for years instead of one that sheds beads in a drawer by January.
Follow the six steps, respect the cure time, and seal with the right product — the troubleshooting section exists precisely so you don’t have to learn those lessons by losing a coaster.
🎄 Ready to start? Browse the diamond painting coaster collection and grab a Christmas set before the holiday shipping window closes.
Choosing a coaster set to start from? The Christmas collection page shows the coaster and ornament options alongside framed and hanging pieces, so you can compare sizes before you commit.